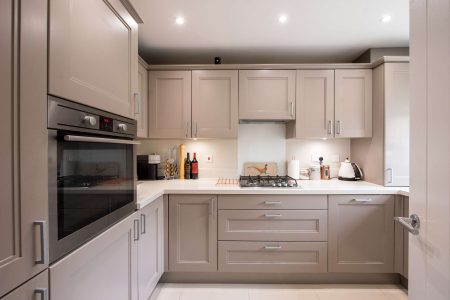
How hard can a full-scale DIY kitchen remodel be? Sure, it devours all your free time, friends avoid you, and your health declines. But you save tens of thousands of dollars and finally get a decent kitchen, one without teal-and-salmon laminate countertops.
Here are the eight things I wish I knew before renovating my kitchen, and how I would do the project differently next time.
You’ll Have No Kitchen for a Very Long Time
When I told people my kitchen remodel would take a month to complete—two, at the most—I was met with polite silence. They knew what I should have known.
Bringing a full kitchen remodel to the point where you can cook a pot of pasta takes three months, minimum. That’s just the big stuff. Completing the punch list of loose ends extends the project by another month or two.
What I’d do differently next time is create a temporary kitchen that helps me cook healthy, fresh food. Three months of eating frozen food is sad and unhealthy. If I were to do it again, I would set up an induction cooktop and use real kitchenware, not paper plates. I’d also budget in a restaurant meal or two per week.
Want more home reno project tips and inspiration? Sign up for our free daily newsletter for the latest how-tos, reno guides, and more!
Subfloor Should be Replaced
The kitchen subfloor is its bedrock. Flooring, appliances, tables, and, most significantly, the base cabinets are only as good as the kitchen subfloor.
If the house is only a few years old, the kitchen subfloor might still be in perfect condition. You can get by with pouring leveling compound or pounding down a few nails. But if you have an older house, the kitchen subfloor will probably be in poor shape.
I spent countless hours repairing the kitchen’s faulty subflooring until I decided to remove and replace it. I’m glad I did. Those full sheets of 23/32-inch, tongue-and-groove subfloor plywood provide a perfect, smooth, trouble-free base for mounting the base cabinets.
Insulation Will be in Bad Shape
I braced myself to find a couple of bad patches of insulation behind the kitchen drywall. What I didn’t expect to find was zero insulation. No wonder my kitchen felt like ice every winter and my energy bills were sky-high.
It’s not unusual to find uninsulated walls in older homes. Even if the kitchen does have insulation, you can expect to find severely moldy insulation behind the sink, around the stove, or under windows.
The rock-wool insulation that I added to the kitchen walls keeps the kitchen toasty warm in winter and provides stellar soundproofing.
Experts Get It Wrong Sometimes
The countertop estimator showed up with a laser level that he said cost $815. He also had a tripod, several tape measures, and years of experience. One thing was wrong, though. He didn’t once look at my kitchen sink.
I mustered up the courage to ask him to remove the sink from the box and actually look at it. He did this. After a moment, he quietly said, “I think you just saved my job.” He had assumed the sink’s dimensions, which turned out to be wrong.
It’s acceptable to politely ask the pros to double-check measurements or to explain something. You’re paying for it, and they expect it.
Packaging Is Endless
We’re all familiar with the sight of Amazon boxes by the door waiting to be taken to the recycling bin. I expected a few boxes with the kitchen remodel.
But I didn’t expect the mountains of packaging material that piled up constantly. From large appliances down to cabinet hardware, everything comes in boxes. Every shipment of cabinets, sink, plumbing materials, or electrical supplies brings more cardboard, foam, and plastic.
Next time, I would dedicate a spare bedroom or hallway for storing packaging. I’d also make sure to cut up all boxes immediately to compress their overall bulk.
Electrical System Isn’t Set in Stone
When you apply for the electrical permit, you must itemize everything you plan to do. Electrical inspectors expect you to stick to that plan.
Yet much can change after the permit is approved. I learned that I could build wiggle room into the kitchen electrical system. In some cases, I had to remove previously installed cable and boxes. But it was worth it.
I added service loops to electrical cables so I could move electrical boxes a few inches if necessary. I also removed several electrical boxes nailed to studs and replaced them with adjustable boxes. Finally, I added a couple of extra outlets, just in case.
Cabinet Assembly Is a Huge Project
I’d scored high-quality kitchen cabinets for a fraction of the expected price. The cabinet boxes were constructed of furniture-grade 1/2-inch plywood, and the doors and drawer fronts were solid wood. The only catch was that I had to assemble the cabinets myself.
It turns out that assembling cabinets is not to be taken lightly. You won’t finish it in an evening. Assembling base and wall cabinets for an entire kitchen took me about a week, interspersed with my other life activities.
Ready-to-assemble (RTA) cabinets will significantly reduce the cost of renovating your kitchen. But they take time to assemble, especially the first few when you’re building up your learning curve.
Kitchen Drywall Work Is Relatively Easy
Installing drywall can be a stressful process that involves hanging sheets, mudding, and sanding. Talc-fine dust settles in every corner of the house. By the end, the drywall still doesn’t look right, leaving you wishing you’d hired a professional drywaller.
So, I steeled myself for the upcoming pain and misery. But I didn’t consider that most of the drywall would be covered. Only about a quarter of the drywall would be visible, the rest covered with base cabinets, wall cabinets, large appliances, backsplash, and the exhaust hood.
So, I had stressed over nothing. Only small sections of the walls required perfect drywall work.
Read the full article here


